How to Add HTML Content to a Specific Page in WordPress
Posted by Nuno Marques on 10 Nov 2018
Introduction
WordPress offers incredible flexibility when it comes to customizing your website's functionality. One common customization task is adding HTML content, such as a popup message, to a specific page based on its ID. In this tutorial, we'll focus on adding a lightbox message to a particular page on a WordPress site, using conditional checks and the wp_footer action hook.
Tutorial
Step 1: Identify the Page ID
Before we proceed, we need to identify the ID of the page where we want to display the custom message. You can find this by navigating to the page in your WordPress admin dashboard and checking its URL. The ID will be visible in the URL, typically following the post= parameter.
Step 2: Implement the Conditional Check
In our example, let's say we want to display the custom message on a page with the ID 2647. We'll use a conditional check within our function to ensure that the message is only displayed on this specific page.
<?php
add_action( 'wp_footer', 'age_wine_message' );

function age_wine_message() {
  global $post;

  if( $post->ID == 2647) { ?>
    <!-- HTML content for the custom message -->
  <?php }
}
?>
Step 3: Add the HTML Content
Now, let's add the HTML content for our custom message inside the conditional check. This content can include text, buttons, styles, and any other elements you need for your popup message.
<!-- HTML content for the custom message -->
<div id="age-wine-message">
  <!-- Popup message content -->
</div>
Step 4: JavaScript Functionality (Optional)
If you want to add interactive functionality to your popup, such as closing it when a button is clicked, you can include JavaScript code within the same function.
<script>
  window.addEventListener('load', function (event) {
    jQuery('#close-age-message').click(function () {
      jQuery('#notice-bg').fadeOut(600)
      jQuery('#age-wine-message').fadeOut(300)
    })
  })
</script>
Conclusion
By following these steps, you can easily add HTML content, such as a custom message popup, to a specific page on your WordPress website. This level of customization enhances user experience and allows you to deliver targeted messages to your audience.
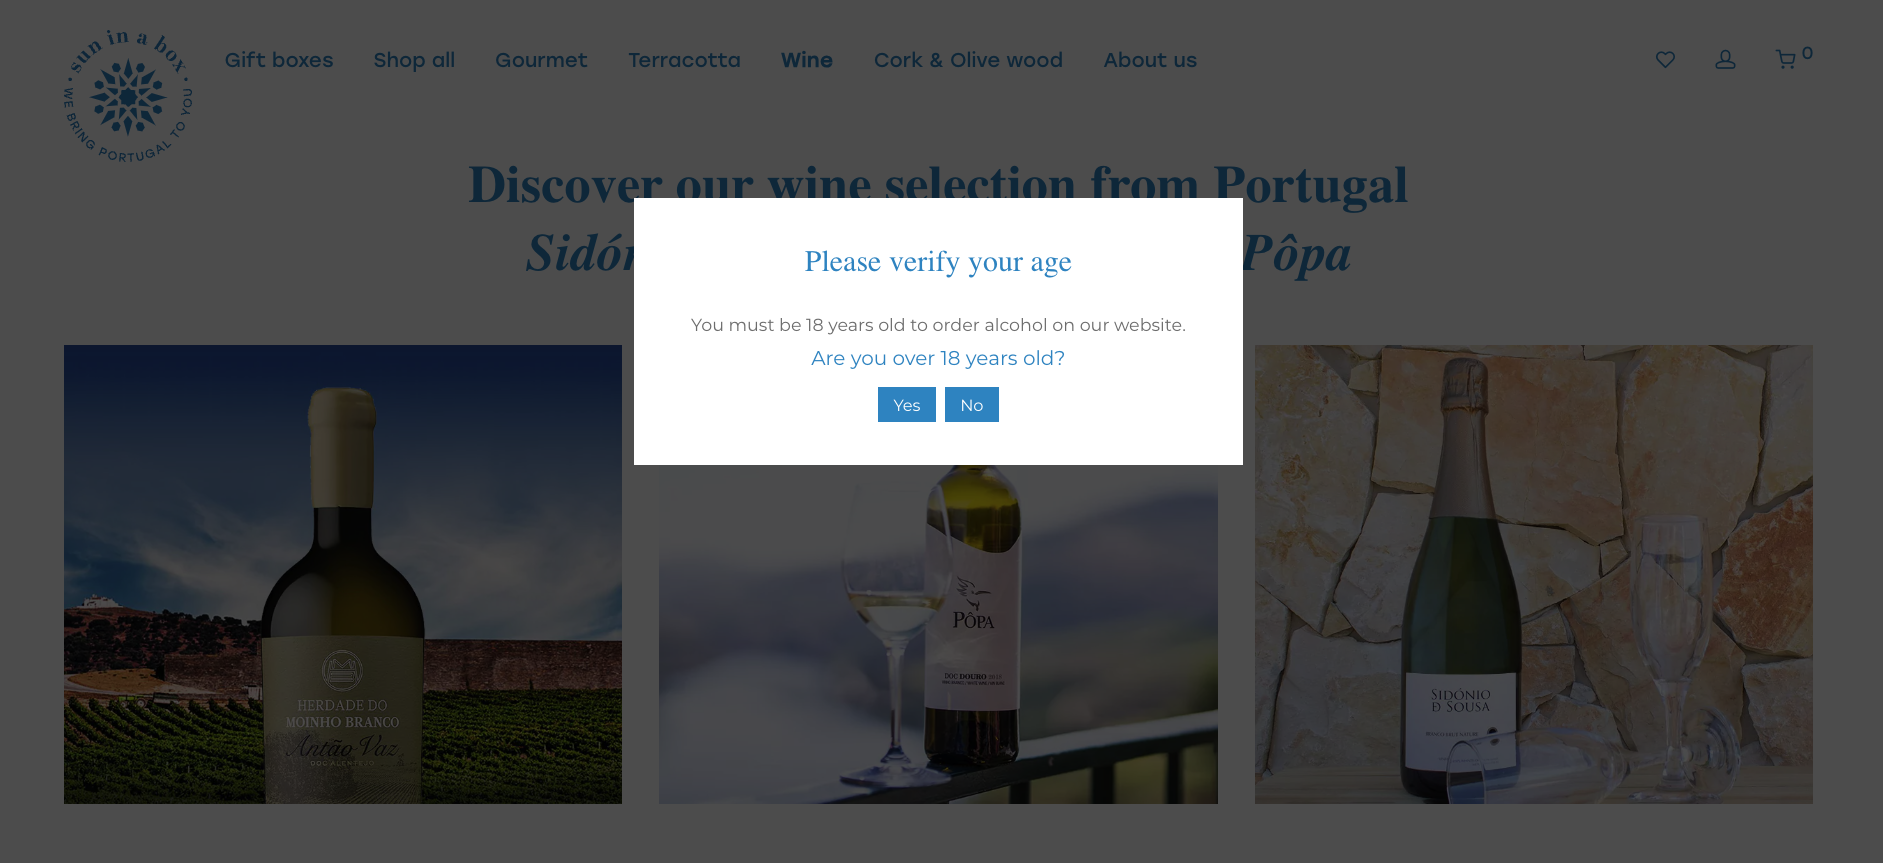
Example of Custom Message Popup

Complete Code
/*  18 Year Old — Popup message on wine page
  =============================================================== */

<?php
add_action( 'wp_footer', 'age_wine_message' );

function age_wine_message() {
  global $post;

  if( $post->ID == 2647) { ?>
    <div id="age-wine-message">
      <div id="nm-lightbox-content" class="nm-row" style="position: fixed; top: 20%; height: 60%; width: 50%; left: 25%; right: 25%; z-index: 10001;">
        <div id="nm-lightbox-content" class="col col-sm-8 col-xs-12 centered nopad">
          <div style="padding:7%; text-align:center; background:#fff;">
            <h3>Gelieve uw leeftijd te verifiëren</h3>
            <p style="margin-top: 20px; margin-bottom: 0!important">U moet 18 jaar oud zijn om wijn op onze website te bestellen</p>
            <h4 style="margin-bottom: 10px;">Bent u ouder dan 18 jaar?</h4>
            <a style="font-size: small; margin-right: 4px; padding: 6px 12px" href="#" id="close-age-message" class="button">Ja</a>
            <a style="font-size: small; padding: 6px 12px" href="/" class="button">Nee</a>
          </div>
        </div>
      </div>
    </div>

    <div
      id="notice-bg" class="mfp-bg nm-wp-gallery-popup nm-mfp-zoom-in mfp-ready"
      style="position: fixed; top: 0; left: 0; bottom: 0; right: 0;">
    </div>

    <script>
      window.addEventListener('load', function(event) {
        jQuery('#close-age-message').click(function() {
          jQuery('#notice-bg').fadeOut(600);
          jQuery('#age-wine-message').fadeOut(300);
        });
      });
    </script>
  <?php }
}
?>